Building the Golfer Roster
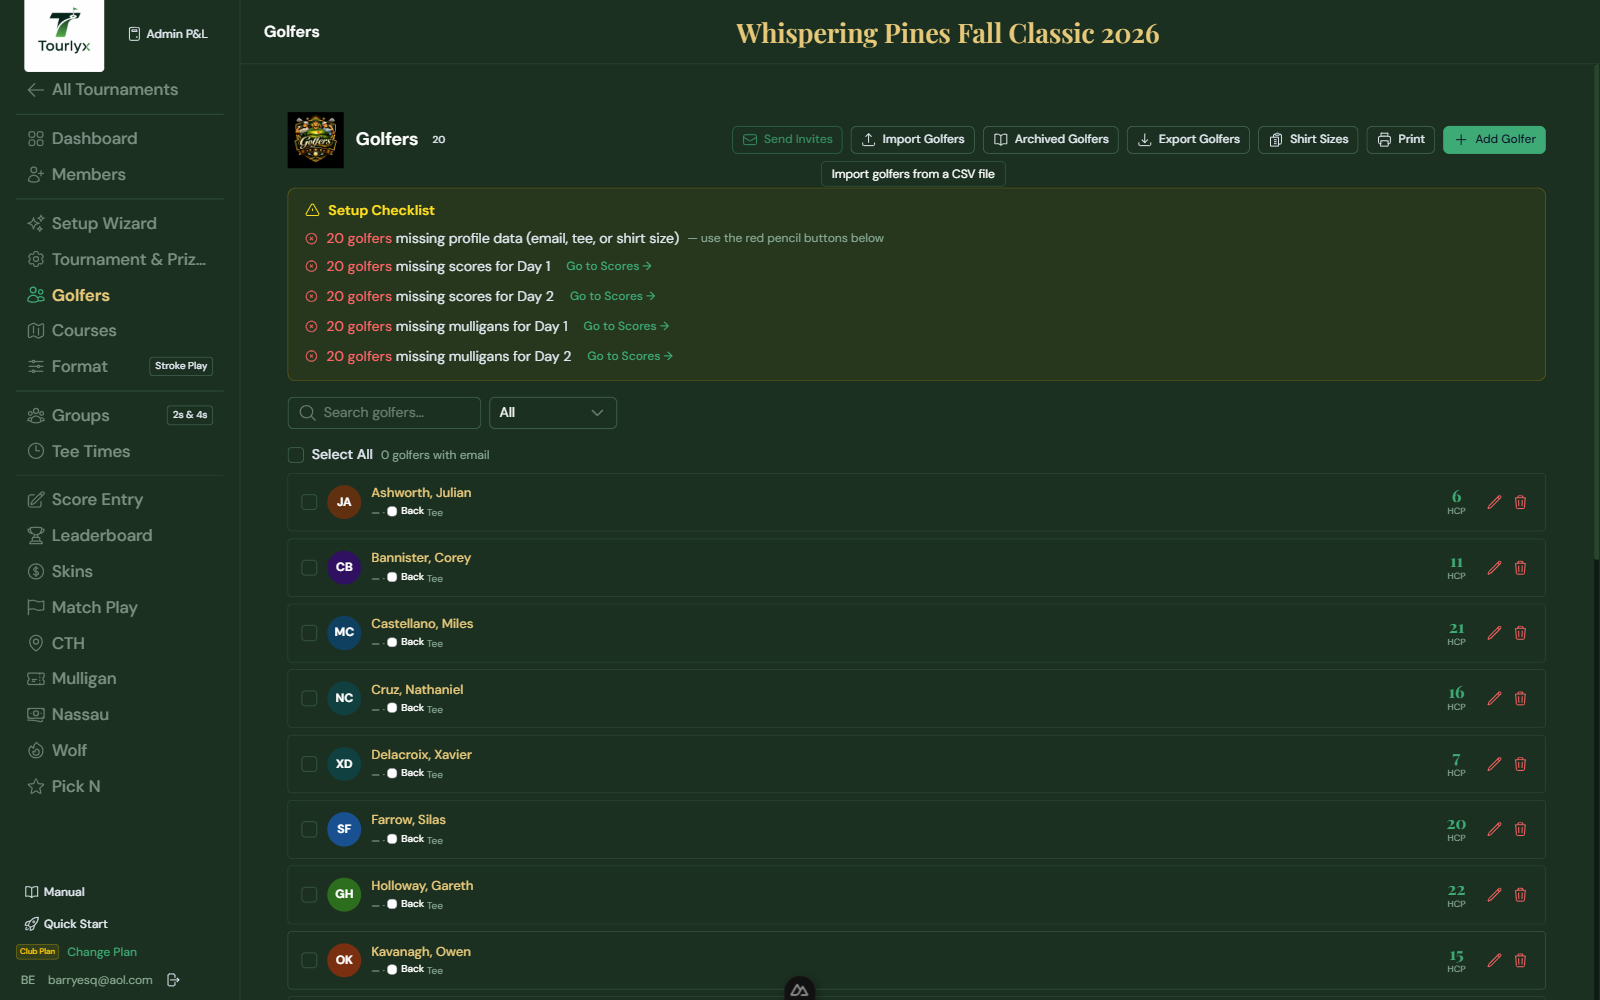
The Golfer Roster is the list of all participants. Every score, pairing, and financial record is tied to a golfer record, so it is important to have accurate information — especially handicap — before pairings are created.
Adding Golfers Manually
- Click Golfers in the tournament navigation.
- Click Add Golfer (green button, upper right).
- Fill in the golfer details (see field reference below).
- Click Save Golfer. The golfer appears in the roster.
- Repeat for each participant.
| Field / Option | Description |
|---|---|
| First Name | Optional. Golfer’s first name. |
| Last Name | Required. Golfer’s last name. |
| Gender | Male or Female (default: Male). Affects the Shirt Size label — a Women’s badge appears automatically when Female is selected, helping you order the correct apparel. |
| Handicap | USGA handicap index (whole numbers, e.g., 14). Default is 0 (scratch). Use the +/− buttons or type directly. Used for net score calculations. |
| Optional. Used to send tournament invitations and for golfer identification. | |
| Phone | Optional. For contact purposes; printed on the roster if provided. |
| GHIN | Optional. USGA GHIN number for official handicap verification. |
| Shirt Size | Optional. Useful for ordering tournament shirts or apparel. A Women’s badge appears next to this label when the golfer’s gender is set to Female. |
| Tee | The tee color this golfer plays from. Overrides the tournament default tee. |
| Note | Free-text field for any additional notes about the golfer. |
Filtering and Searching the Roster
- Use the search bar to filter golfers by name or email.
- Use the Gender filter dropdown to display only Male or Female golfers — useful when organizing separate tee assignments or ordering gender-specific apparel.
Importing Golfers from CSV
For large fields, import the entire roster at once using a CSV file.
-
Prepare a CSV file with columns in this order:
First, Last, Handicap, Email, Phone, GHIN, ShirtSize, Tee, Note -
On the Golfers page, click Import CSV.
-
Upload your file or paste the CSV contents into the text area.
-
Review the preview and click Import. All golfers are added in bulk.
Editing and Removing Golfers
- Click the pencil icon on a golfer card to edit their details.
- Click the trash icon to delete. Scores tied to a deleted golfer are also removed.
Sending Invitations & Update Notices
The Send Invitations feature emails golfers their tournament details — date, location, tee time, and playing partners. Tourlyx automatically sends the right type of email for each golfer: a first-time invitation or a follow-up update notice, depending on whether that golfer has been emailed before.
How to Send Invitations
- Click Golfers in the tournament navigation.
- Click the Send Invitations button (envelope icon) near the top of the page.
- Select the golfers you wish to email. Only golfers with a saved email address appear in the list.
- Click Send. Tourlyx delivers a personalized email to each selected golfer.
Invite vs. Update Emails
Tourlyx tracks whether each golfer has been emailed before and automatically chooses the correct email type:
- First-time Invitation — sent when a golfer has never been emailed. Subject line: “You’re invited: [Tournament Name]”. Contains the tournament date, location, assigned tee time, and playing partners.
- Update Notice — sent when a golfer has already received an invitation. Subject line: “Update: [Tournament Name]”. Compares the current tournament details against what was in the previous email and highlights any fields that changed.
Invited Badge on Golfer Cards
After a golfer is emailed, their roster card displays an Invited badge showing the date the most recent email was sent. This lets you see at a glance who has been notified and who still needs to be contacted — without having to open any external email tool.
What Is Included in the Email
| Field / Option | Description |
|---|---|
| Tournament Name | The official name shown prominently in the email header. |
| Date | Tournament start date and total number of days (e.g., “Saturday, July 12, 2026 (3 days)”). |
| Location | Course or city as entered in Tournament Details (omitted if not set). |
| Your Tee Time | The golfer’s assigned tee time and group name, pulled from the Tee Times page. For multi-day tournaments, the earliest scheduled day is shown. |
| Playing Partners | Names of the other golfers in the same group as the recipient. |
| RSVP Button | A one-click button that opens a pre-addressed reply email to the tournament director. |
Pick N — Entering Golfer Picks
If the Pick N wager is enabled, each participant must select N other golfers as their picks before the tournament begins.
- Each golfer card shows a Set N Picks button.
- Click it to open the picks modal.
- Select exactly N golfers from the roster.
- Click Save Picks.
- Use Randomize All or Import Pick CSV for bulk operations.